ELEARNING TUTORIAL—ADVANCED
We're getting closer to producing some output, but first we need to create and develop some targets, which are the files that actually generate the output. Our project already has two targets—one intended for online output (using the necessary HTML5 format), and the other for PDF output. But in this tutorial, we actually want to create three different online outputs—one that will include the knowledge check and test topics (i.e., combination), a second that will include only the knowledge check topics, and a third that will include only the test topics. Of course, all of these outputs will also include the other regular topics containing information about the city of Austin, Texas, but our goal for these three targets is to pinpoint which eLearning topics are shown.
[Menu Proxy — Headings — Online — Depth3 ]
How to Rename and Develop the Combination Target
Let's rename our existing online target so that it reflects our intention to create output combining the knowledge checks and test.
-
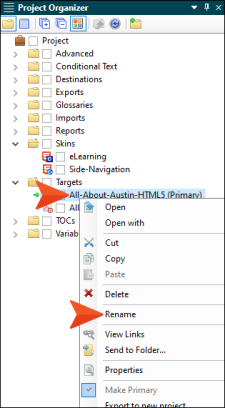
In the Project Organizer, expand Targets.
-
Right-click All-About-Austin-HTML5, and from the context menu, select Rename.
-
Type Combination-Course and press ENTER.
-
Double-click that target to open it.
-
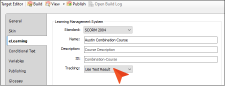
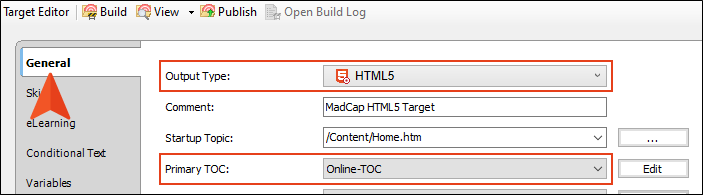
We're going to leave a lot of the settings in the target just the way they are, but we want to look at and edit a few things. On the left side of the editor, select the General tab.
-
Notice that the Output Type field is set as HTML5, which is the most popular (and recommended) target format for online output, and what you need in order to include an interactive eLearning course. Also, from the Primary TOC field, make sure Online-TOC is selected.

-
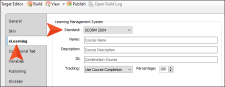
Select the eLearning tab.
-
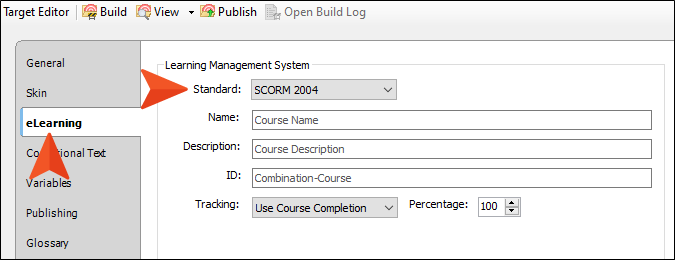
In this tutorial, we're not actually going to integrate the output with an external learning management system (LMS). But for the moment, let's pretend that we will be doing that. From the Standard field, select SCORM 2004.
Note SCORM 2004 is just one of the standards available. You can select a different one from the field (i.e., SCORM 1.2 or xAPI) if you want.
-
For the Name, enter Austin Combination Course.
-
We could also provide a description and custom ID, but for this tutorial, let's just leave those fields as they are.
-
From the Tracking field, select Use Test Result. Because we have include a test node in our TOC, this is the option we want, so that the external LMS uses the results from that quiz.
-
Select the Conditional Text tab.
-
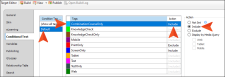
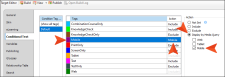
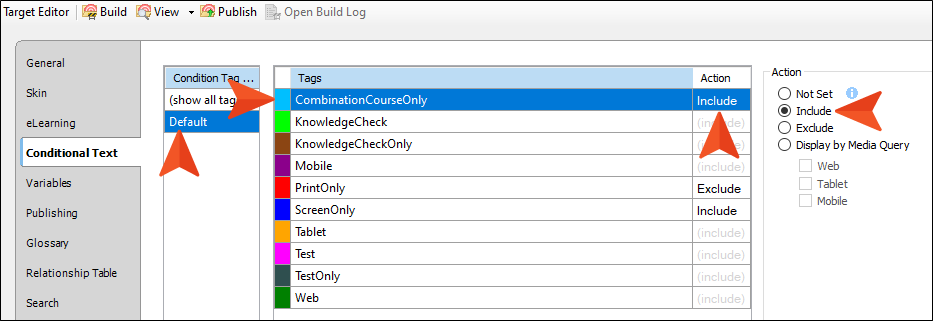
Here is where we finally make use of those conditions that we created and applied earlier. We need to tell Flare which conditions should be included or excluded from the output generated by this target. On the left side of the editor, select Default. Then, click the CombinationCourseOnly row, and on the right side select Include. This sets the action for that condition row.
-
For the KnowledgeCheck and Test condition rows, select Include.
-
For the KnowledgeCheckOnly and TestOnly condition rows, select Exclude.
-
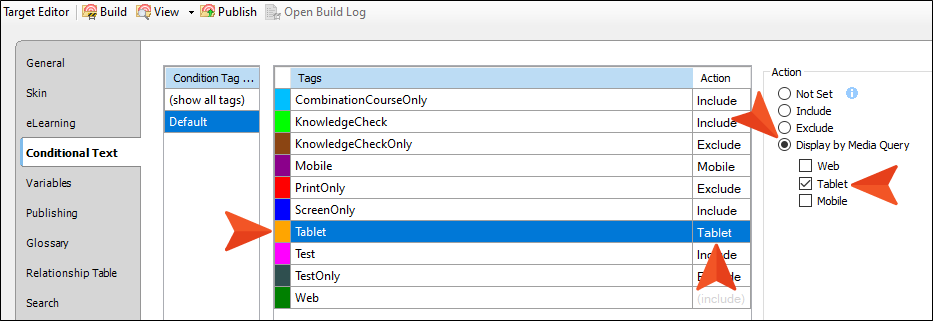
The PrintOnly and ScreenOnly condition rows are already set. The idea is that the PrintOnly condition can be applied to content and files that should be included only in print-based targets (such as PDF), and the ScreenOnly condition can be applied to content and files that should be included only in online targets. Of course, you don't need to use these conditions in your actual project if you so choose, or you can rename them and use them for another purpose. The other three condition rows that are shown in this target are Mobile, Tablet, and Web, which are intended to be used for responsive outputs. In other words, you can apply these conditions to content so that the online content is displayed in a certain way, depending on whether the learner is viewing it on a small, medium, or large screen. Currently, these are not set, so by default they will be included in the output with no special circumstances. But let's set them as intended, just in case you want to use those conditions on content in the future.
To begin, select the Mobile condition row, and on the right, select Display by Media Query, then Mobile.
-
Select the Tablet condition row, and on the right, select Display by Media Query, then Tablet.

-
Select the Web condition row, and on the right, select Display by Media Query, then Web.
-
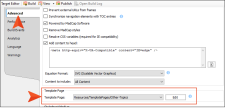
Select the Advanced tab on the left side of the editor.
-
Scroll down and notice that the Template Page field is pointing to the Other-Topics template page. This is how Flare knows to use that particular template page (which, in this case, contains our eLearning Toolbar proxy) for most of the topics in the output. The only topic that is using a different template page is the Home page (in that case, the Home-Page template page is set in the topic properties for that file).
-
Click
") to save your work.
to save your work.


How to Develop the Knowledge Check Target
Most of the settings for our second output—which will display the knowledge check topics but not the test topics—should be identical to those in the target we just edited. So the easiest thing to do in this case is make a copy of the first target, rename it, and make a couple of tweaks.
-
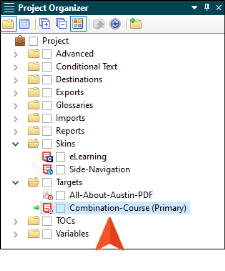
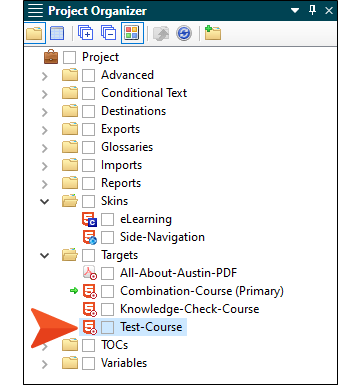
In the Project Organizer on the left side of Flare, select the Combination-Course target file and press CTRL+C on your keyboard. Then, press CTRL+V.
-
Right-click the copy of the target that is added, and from the context menu, select Rename.
-
Type Knowledge-Check-Course for its new name and press ENTER.

-
In the same way, make a copy of that target and rename the new target Test-Course.

-
Double-click Knowledge-Check-Course to open that target.
-
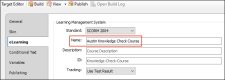
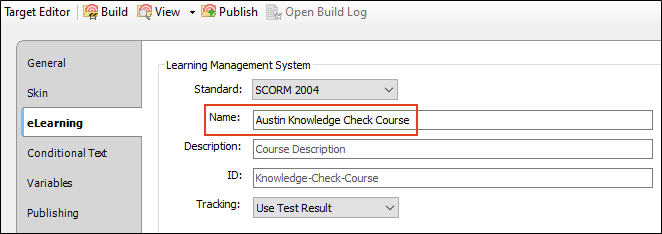
Select the eLearning tab.
-
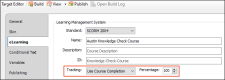
Change the Name field to Austin Knowledge Check Course.
-
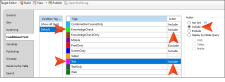
From the Tracking field, select Use Course Completion. This is different from the option we chose in the previous target, because this output will not include a gradable quiz. We'll leave the Percentage field set to 100, which means learners must complete the entire course.
-
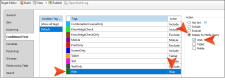
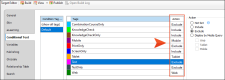
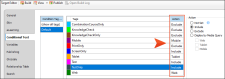
Select the Conditional Text tab.
-
Change the settings so that they match the following image.
-
Click
to save your work.


How to Develop the Test Target
-
In the Project Organizer double-click the Test-Course target file to open it.
-
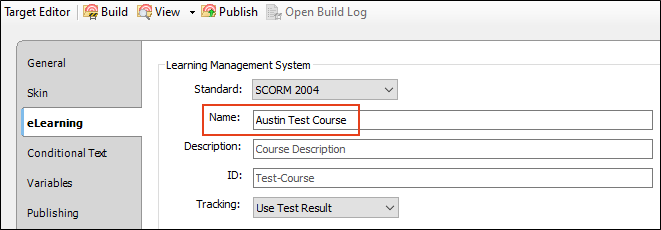
Select the eLearning tab.
-
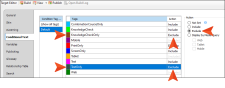
Change the Name field to Austin Test Course. We'll leave the Tracking field as is because this output will include the gradable quiz.

-
Select the Conditional Text tab.
-
Change the settings so that they match the following image.
-
Click
to save your work.