The Branding-Template.xml file contains the branding schema for the project template.
-
From the Preview folder you copied, open the Branding-Template.xml file in a text editor, such as Notepad++.
-
Replace the values with those you will be using in your project template. In other words, they should be the same as those in the Branding.css file you just edited.
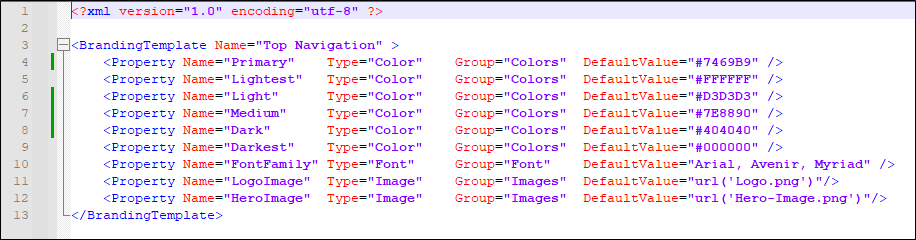
Example In our Balboa project template, our edited Branding-Template.xml file looks like this:
Just as we did with the variables in our stylesheet, we removed Secondary, because we do not intend to use it.
-
(Optional) The order in which the template properties appear in this file determines the order they will appear in the branding page of the Start a New Project Wizard or the Branding Editor.
If you want to change the order of the fields, you can move the properties around in this file. However, this only affects the order of the fields in the same group (i.e., Colors, Font, Images). For example, you can move the color properties around so that they display in alphabetical order, but you cannot move the image fields above the color fields.
-
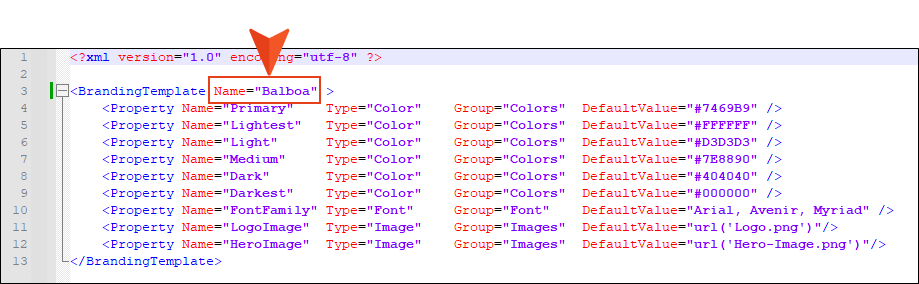
Edit the name of the template to reflect your project name.
Example Our project template is name Balboa, so that's the name we gave it in this file:
-
Save your changes.